
D1 Dryer — setup and first assembly
This guide covers unboxing, assembly, and first-time setup of the D1 pellet dryer. The D1 arrives partially disassembled and packaged in a wooden crate. Assembly requires no special skills but you will need a cordless drill.
Physical description
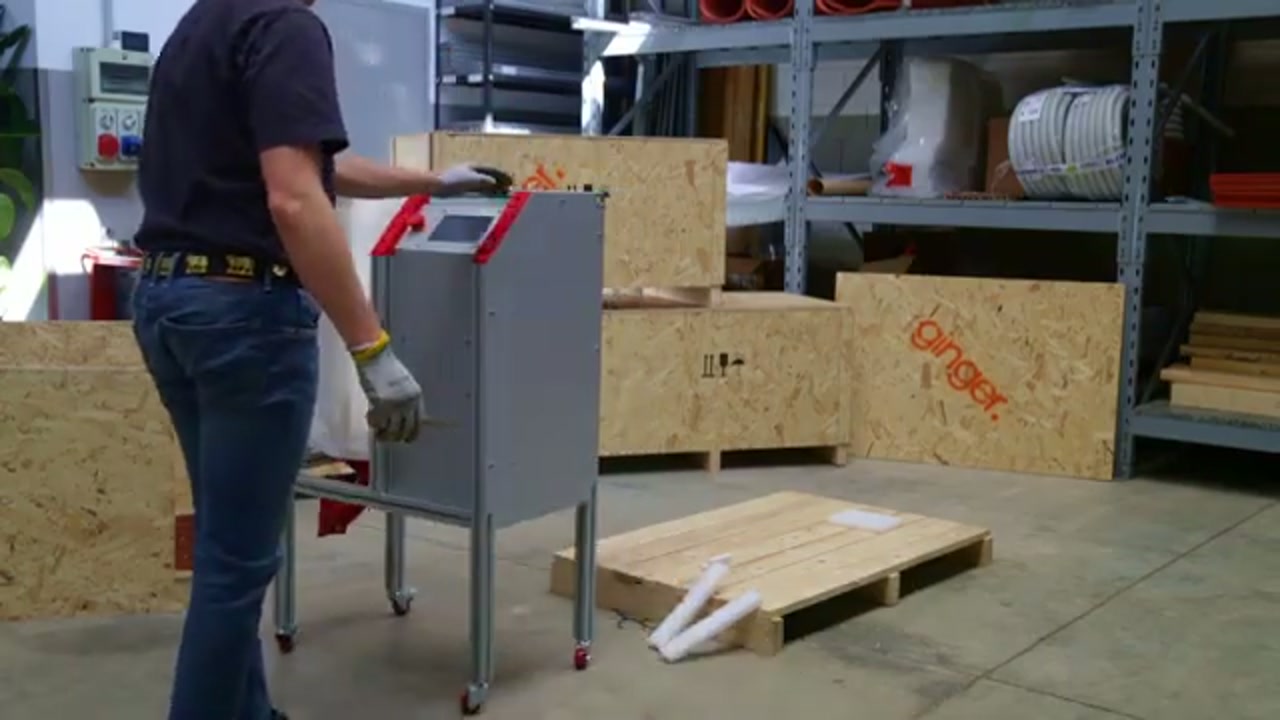
Section titled “Physical description”The D1 is a compact vertical pellet dryer built on an aluminum profile frame with a sheet-metal enclosure.
| Feature | Description |
|---|---|
| Frame | Aluminum profile structure, silver/grey |
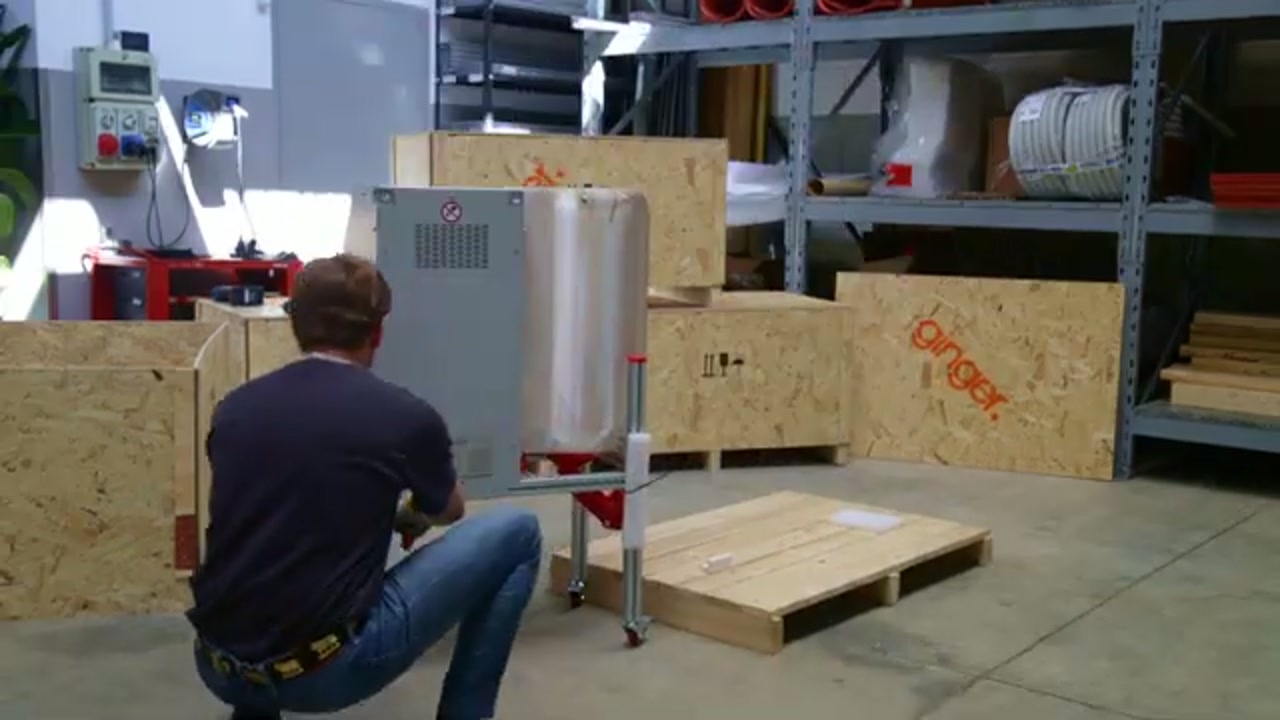
| Body panels | Grey sheet metal, ventilation grille on rear panel |
| Pellet tank | Cylindrical transparent acrylic tank, horizontal orientation, mounted on the side of the frame |
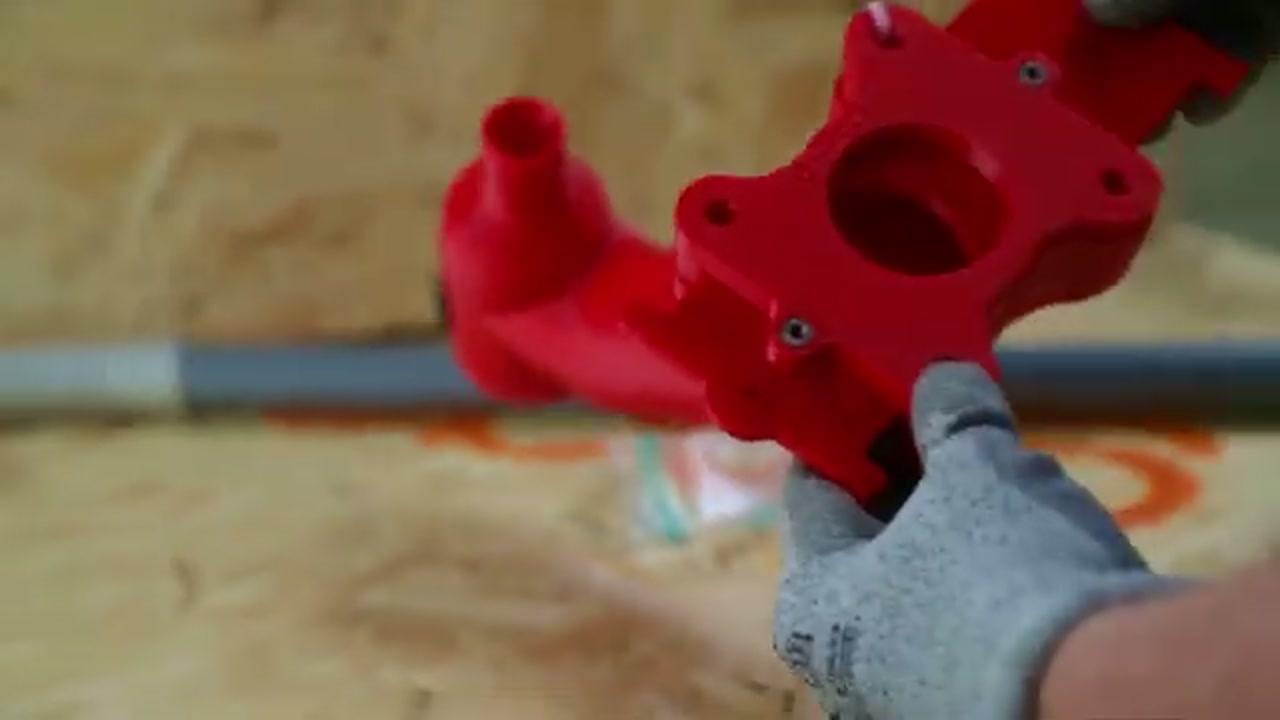
Pellet gate (D1-P025) | Red moulded body that bolts under the tank. It carries the guillotine knob, the outlet the feed line clamps onto, and the air inlet that lets the vacuum carry pellets away |
| Mobility | 4 red caster wheels (2 fixed, 2 swivel with brake) |
| Control panel | Front-mounted, red top bar, small embedded display, touch or push-button controls |
What’s in the box
Section titled “What’s in the box”The D1 ships in a wooden crate (OSB board, branded with the Ginger logo in orange). Inside the crate you will find:
- The D1 dryer frame with tank — horizontal on the pallet, wrapped in protective plastic film
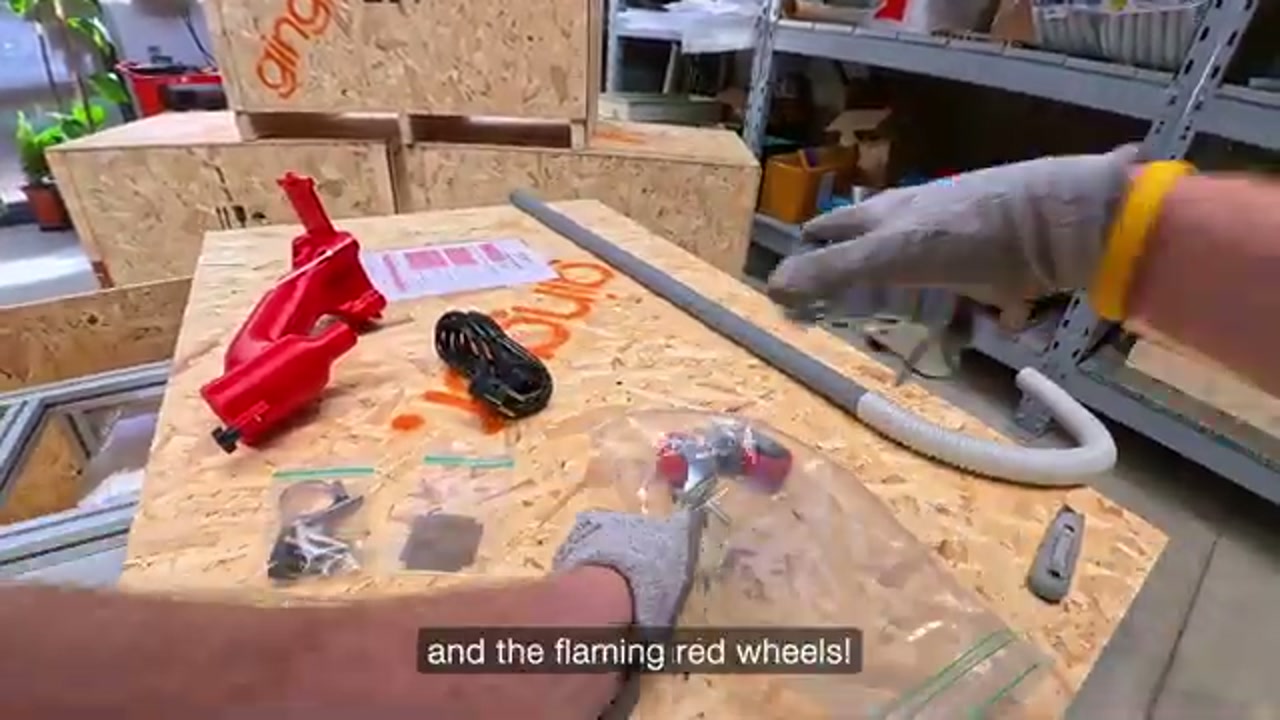
- A cardboard accessories box containing, in the order the video shows them:
- The feeding tube for the line to the printer — see Corrugated tube for how the full line is arranged
- The red pellet gate (
D1-P025), wrapped in bubble wrap - A ziplock bag: screws and nuts, and a metal zip tie
- The power cord
- A spare filter
- The four red caster wheels
Tools required
Section titled “Tools required”- Cordless drill / screwdriver — required to mount the pellet gate screws
- Scissors or side cutters — to cut the white zip-ties that secure the tank during shipping
Assembly — step by step
Section titled “Assembly — step by step”-
Open the wooden crate
Use a cordless drill (or screwdriver) to remove all screws from the crate lid. Also remove the screws from the center beams. Lift and remove the top and side panels.
The D1 frame (horizontal, with tank still wrapped) is on the wooden pallet inside.
-
Unpack the accessories box
Locate the cardboard box inside the crate. Open it and lay out all parts: pellet gate, corrugated tube, power cable, casters, and the ziplock bag with screws.
-
Raise the crate’s wooden side panels and slide the dryer out
This is a two-person step: lift the wooden sides away, then slide the dryer towards you until its legs clear the pallet. Fitting the wheels is much easier with the legs overhanging than with the unit sitting flat.
-
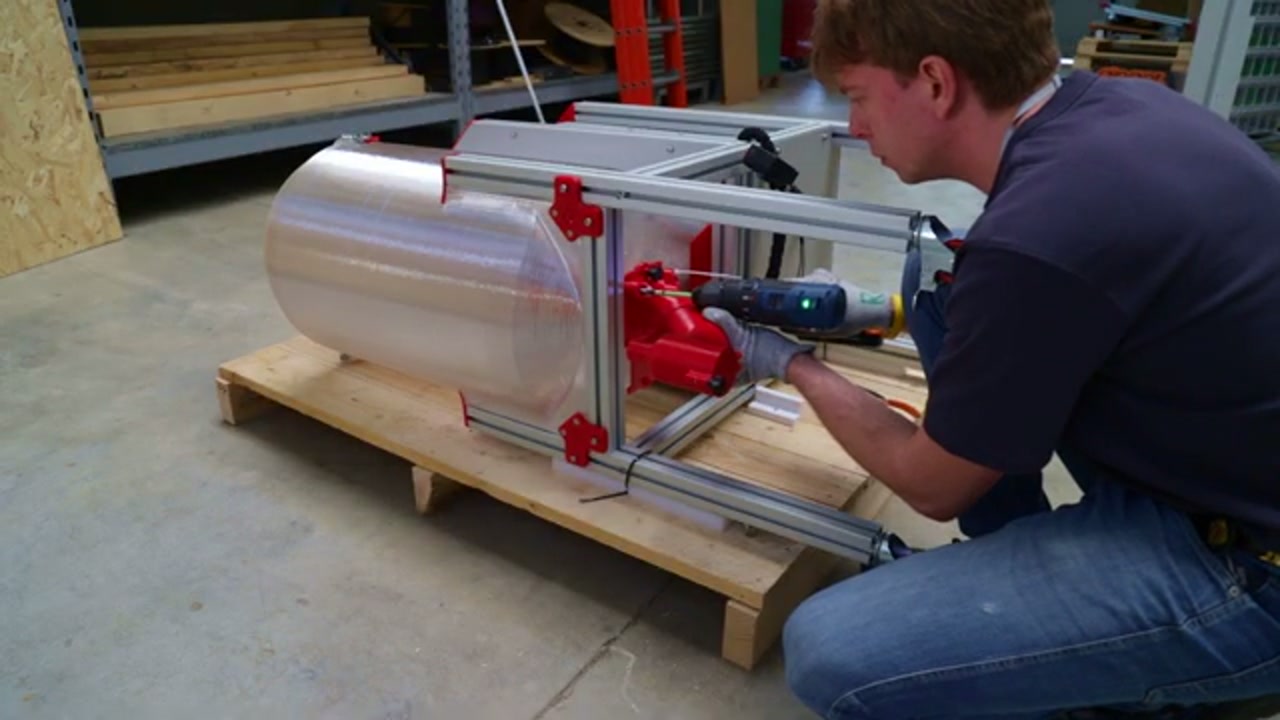
Attach the 4 red caster wheels
Screw one into each leg. Hand-tighten first, then finish with pliers — they need to be properly tight or the dryer rocks under its own load.
The two braked casters go on the short side. The manual is specific about it, and gives the reason: that is what lets the machine be locked properly, and what keeps it from tipping.
-
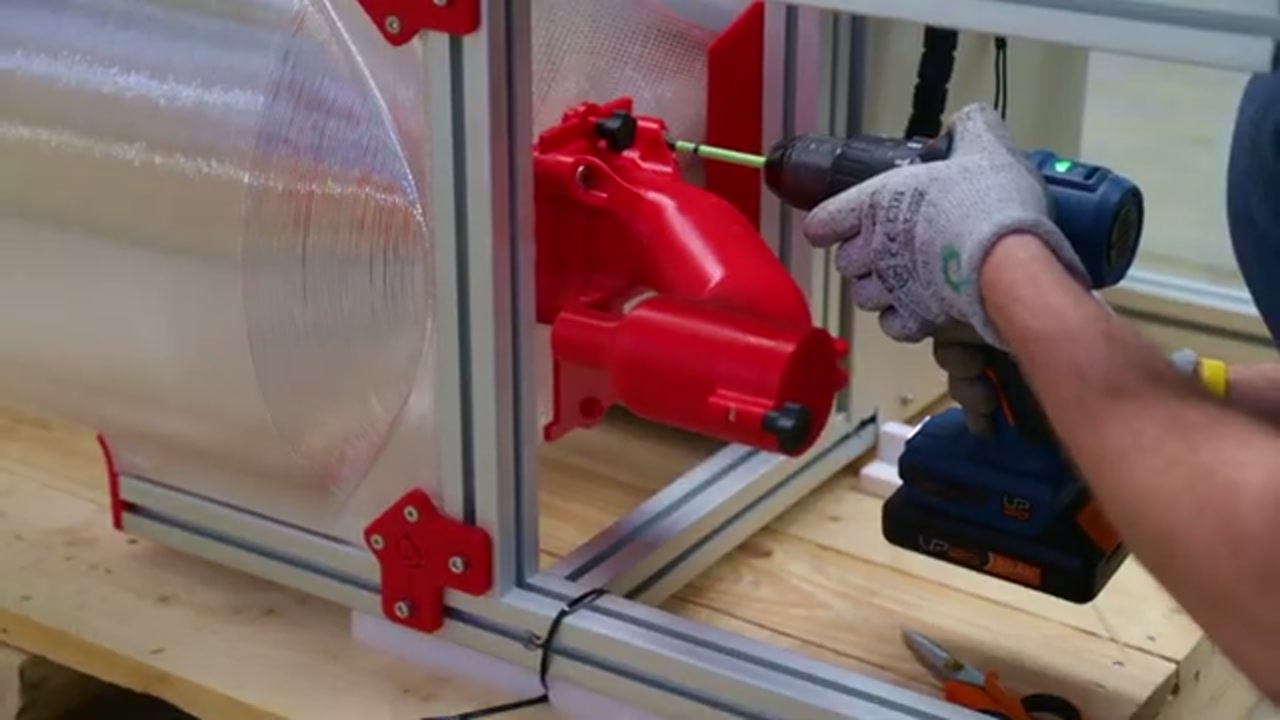
Fit the pellet gate under the tank
Do this while the dryer is still overhanging the pallet, before standing it up. There is room to work under the tank now and there will not be later — which is the order the video follows.
- Drop the square nuts from the ziplock bag into the two holes in the top face of the gate
- Screw in the knob. That is the guillotine — it has a job during drying as well as before a print, see The guillotine
- Offer the gate up to the tank and start with only two screws, just enough to hold it in position, then fit the rest
- Tighten it properly, but do not lean on it — the body is plastic and the tank is right above it
-
Cut the two white zip-ties from the tank
The tank is held to the frame by two white zip-ties for transport. Cut both — the video calls that out, because one is easy to miss. Take care not to scratch the tank.
-
Stand the D1 upright
Now, not earlier. It should roll freely on a flat floor. Once it is standing, cut the remaining zip-ties holding the protective wrapping.
-
Connect the feed line
The line to the printer leaves the pellet gate under the tank, clamped on with a worm-drive hose clamp. It is not one tube but three sections, and the middle one is rigid on purpose — Corrugated tube has the arrangement and the reason.
-
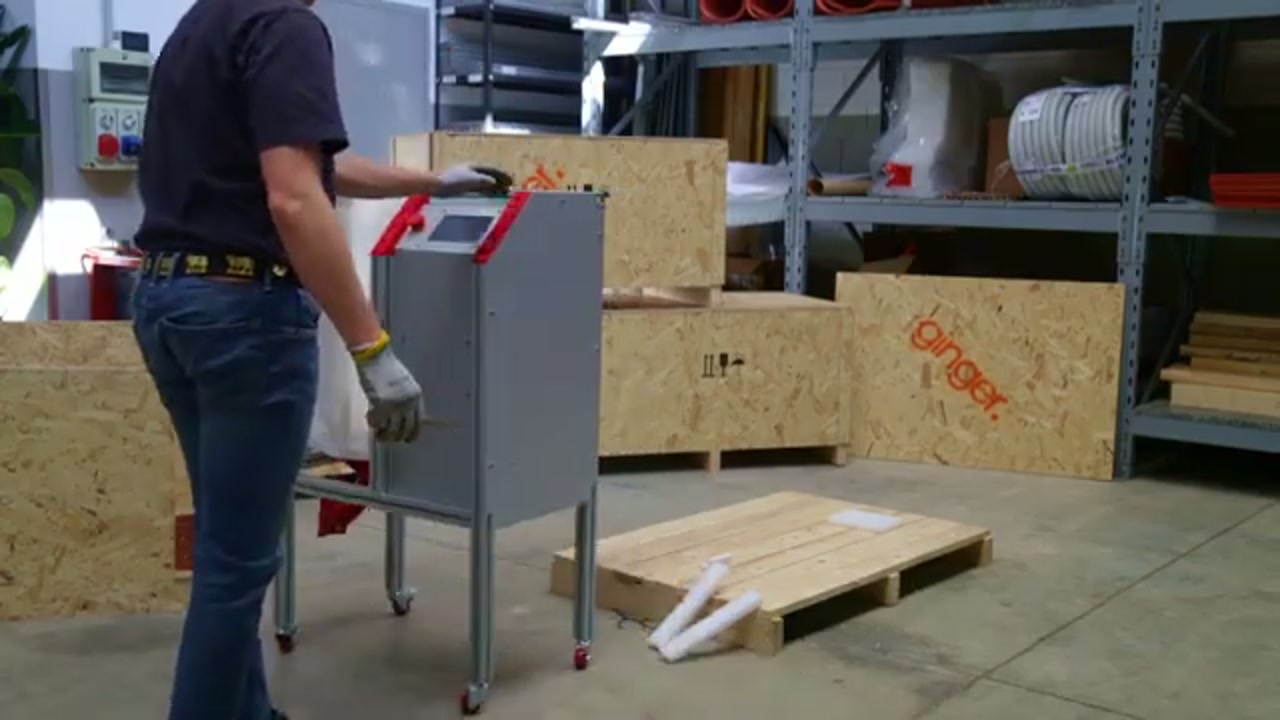
Connect the power cable
Plug the black power cable into the D1 power socket (rear or side panel). The other end connects to a standard power outlet.
First power-on
Section titled “First power-on”- Lock the two braked casters
- Check the emergency stop is not pressed. If the mushroom is down, turn it clockwise until it releases — the machine stays dead until it is reset by hand
- Plug the power cable into a wall outlet
- Switch on at the main switch. Its built-in LED lights to confirm the machine is powered, and the control panel comes up on its Home screen
- Load pellets through the lid on top of the tank — no more than three quarters full, or the air cannot get through the pellets to dry them
- Set the temperature with the − and + buttons. The range is 30–75 °C in 5 °C steps
- Turn on the drying cycle with the toggle. The machine takes itself to the setpoint and holds it
There is no timer. The cycle runs until you turn the toggle off, so count the drying time yourself — and count it from when the display reaches the setpoint, not from switch-on.
The panel goes to a screensaver after a while to spare the display. Touch it anywhere to bring the Home screen back; it is not switched off.
The guillotine
Section titled “The guillotine”The knob on the pellet gate is a shutter across the outlet, and it has two positions that matter at different times.
Closed, while drying on its own. It keeps the pellets in the tank instead of letting them sit in the outlet, and the manual says that is what makes the drying efficient.
Connecting to the G1 hopper
Section titled “Connecting to the G1 hopper”The D1 can feed dried pellets directly into the G1 hopper via the corrugated tube:
- Position the D1 beside or behind the G1 printer
- Run the feed line from the pellet gate under the D1 tank to the G1 hopper inlet
- Keep every joint airtight — even a small leak breaks the suction
- The run must rise all the way to the hopper. No descending sections, no dips, no U-bends: wherever pellets can travel downward under their own weight they pile up until the line plugs. The D1 outlet therefore sits lower than the hopper inlet, not level with it and not above it
Recommended temperature settings
Section titled “Recommended temperature settings”Use the same settings as for any other pellet dryer. The D1 control panel accepts temperature in degrees Celsius.
| Material | Target temp | Duration |
|---|---|---|
| PETG | 60–70°C | 4 h minimum, 6 h to aim for. Longer if it still foams |
| PLA — recycled, or left open about a week | 50°C | 4 h. Most virgin PLA needs no drying |
| PLA — virgin | Usually no drying needed | Print it from the bag |
Full temperature guidance and rationale: Starting the dryer.
Shutting it down
Section titled “Shutting it down”Not at the switch. The heater has just been running and the machine cools itself down first.
- Turn the drying cycle toggle off. The fan does not stop with it — it keeps running for some minutes to bring the temperature down
- Wait for the fan to stop on its own
- Only then, main switch to OFF
- Wait for everything to come to rest before cleaning or opening anything
Emergency stop
Section titled “Emergency stop”The mushroom button cuts power to the machine’s components immediately. After it has been hit, the machine stays disabled until someone resets it by hand: turn the mushroom clockwise until it releases, then power up again as above.
Basic maintenance
Section titled “Basic maintenance”- Ventilation grille: keep the rear panel grille clear — do not press the D1 flush against a wall
- Tank cleaning: empty the tank fully between materials to avoid cross-contamination — the procedure is on D1 Dryer — maintenance
- Air filter: the one interval the manual gives — clean it every 500 operating hours
Related notes
Section titled “Related notes”- D1 Dryer overview
- Dryer — temperature table, general dryer guidance, third-party dryer models
- Starting the dryer
- Hopper
- Hopper suction problems
- PETG foaming and moisture
- Loading pellets