
Multi-Heating Zones
The G1 pellet extruder has three independently controlled heating zones along the extrusion barrel. Unlike a filament hotend with one temperature, the G1 needs to manage compression, melting, and final flow as separate stages.
The three zones
Section titled “The three zones”| Zone | Position | Purpose |
|---|---|---|
| Feeding Zone (Zone 1 / T0) | Top, near hopper | Initial heating and pellet compression |
| Melting Zone (Zone 2 / T1) | Middle | Completes melting; ensures homogeneous flow |
| Nozzle Zone (Zone 3 / T2) | Bottom, at nozzle | Maintains the right viscosity for stable extrusion onto the bed |
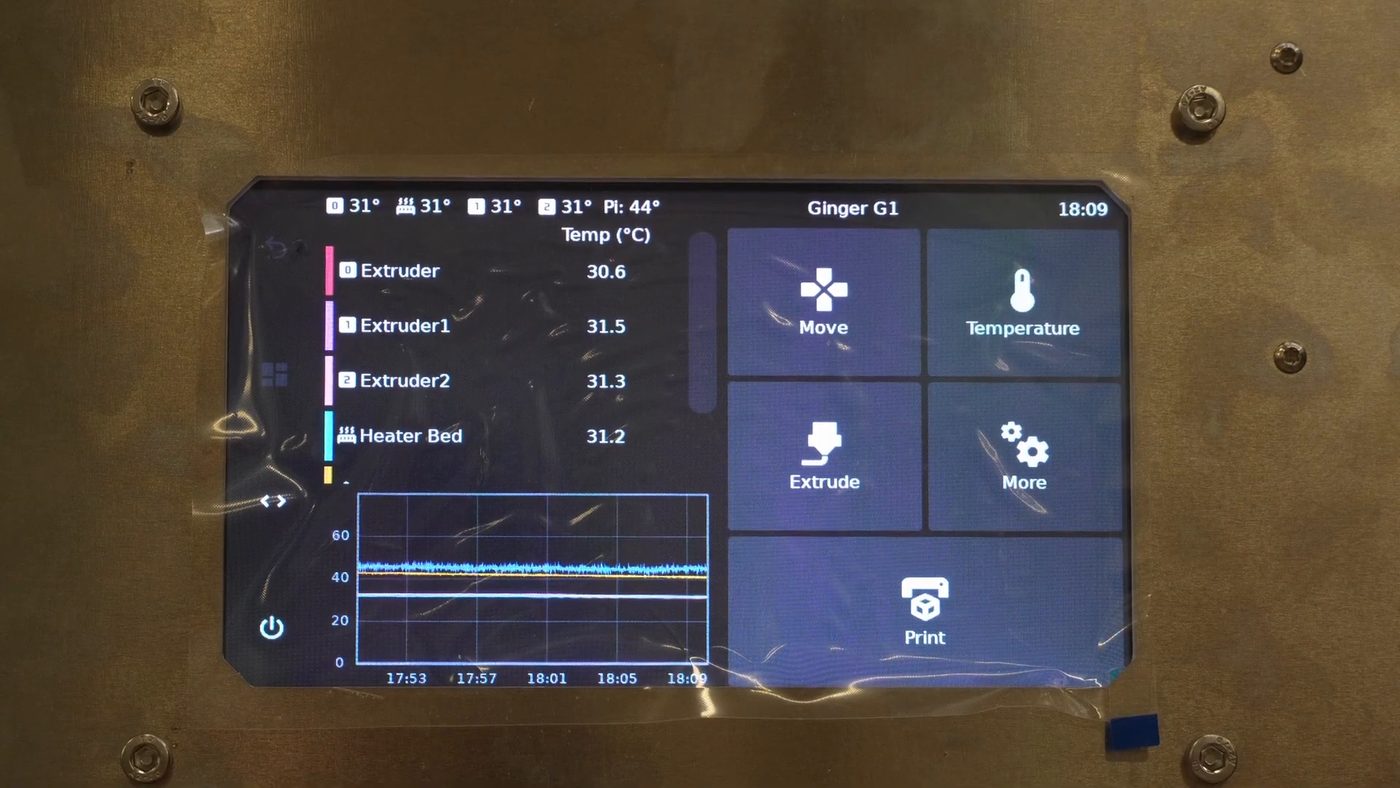
Each zone has its own thermistor (NTC 100k) and heater band. They are tuned independently in the slicer’s material profile.
Zone numbering
Section titled “Zone numbering”| In Ginger Slicer | The band | On the display / in Klipper | Zone |
|---|---|---|---|
| Zone 1 | T0 | extruder | Feeding Zone (top) |
| Zone 2 | T1 | extruder1 | Melting Zone (middle) |
| Zone 3 | T2 | extruder2 | Nozzle Zone (bottom) |
The slicer exposes nothing else about the zones — just the three temperatures.
From How the G1 Automatic Feeding System works — 2:39
Recommended starting temperatures
Section titled “Recommended starting temperatures”Begin with uniform temperature across all three zones, then fine-tune per material grade.
| Polymer | Starting temperature (all zones) |
|---|---|
| PLA | the value in its profile |
| PETG | the value in its profile |
The G1 is supported on PLA and PETG. Other polymers can be extruded but Ginger does not characterise them — see Materials.
Tuning per zone
Section titled “Tuning per zone”Feeding Zone
Section titled “Feeding Zone”The Feeding Zone temperature follows the nozzle and the flow rate. The starting temperatures above are a baseline — expect to adjust the Feeding Zone whenever you change nozzle:
| Situation | What goes wrong | Adjustment |
|---|---|---|
| Small nozzle, low flow | Material dwells in the Feeding Zone and clogs there | Lower the Feeding Zone |
| Large nozzle, high flow | Material moves through too fast to soften properly | Raise the Feeding Zone |
A smaller nozzle also raises back-pressure in the barrel, which pushes molten material upward into the Feeding Zone (heat-creep). When switching to a smaller nozzle, always reduce the Feeding Zone temperature — see the nozzle-specific notes above.
Lower it (by ~10°C) when:
- Melt is creeping up into the feed throat / hopper (a clog forming above the screw)
- Using small-cut pellets (< 3mm, or 1.75mm cylindrical grades) — smaller pellets have more surface area relative to volume and need less thermal energy to reach melt temperature; they soften too early in the Feeding Zone and form a plug before compression completes
- Pellets are fines-heavy (premature softening causes plug)
- Printing very slowly and pellets sit too long in the heated barrel
Raise it (by ~5–10°C) when:
- Irregular under-extrusion suggests insufficient compression
- Using SmoothFlow or Liquid Masterbatch (additives can reduce friction; higher temp restores compression)
- The screw struggles to “bite” the pellets
Melting and Nozzle Zones
Section titled “Melting and Nozzle Zones”These usually stay stable around the recommended polymer temperature. Adjust mainly to ensure complete melting without burning or degrading the material:
- Too cold → solid bits in the extrudate, motor strains, layer adhesion suffers
- Too hot → polymer degradation, browning, weak parts, smoke
Diagnosing temperature vs. Rotation Volume issues
Section titled “Diagnosing temperature vs. Rotation Volume issues”The shape of the fault tells you which knob to reach for. An unsteady extrusion is never a Rotation Volume problem — fix the steadiness first, then calibrate.
| What you see | What it means | What to do |
|---|---|---|
| Irregular extrusion — hiccups in the flow, more or less pronounced | The material is slipping in the Feeding Zone | Tune the Feeding Zone temperature |
| Nothing comes out at all | The material has clogged in the Feeding Zone | Clear the clog — see Extruder screw |
| Consistently too much or too little, but steady | Rotation Volume is wrong for this material | Calibrate Rotation Volume |
| Bubbles, popping sounds | Wet pellets, not temperature | Dry the pellets — see PETG foaming and moisture |
Calibrating Rotation Volume from a printed part
Section titled “Calibrating Rotation Volume from a printed part”This is quick — no test print needed beyond what you already have. Measure the printed wall thickness, compare it with the target thickness set in the slicer, and apply that ratio:
new Rotation Volume = (measured thickness / target thickness) × current Rotation VolumeFull method: Rotation Volume calibration.
Common issue — clogging at the Feeding Zone
Section titled “Common issue — clogging at the Feeding Zone”If melted plastic flows back up into the hopper:
- Lower the Feeding Zone by 10°C
- Verify SmoothFlow dosage isn’t too high
- Avoid printing too slowly — pellets shouldn’t dwell in heat
Stepper motor losing steps at low speeds
Section titled “Stepper motor losing steps at low speeds”When the extruder motor “tak-tak-taks” at low speeds:
- Apply SmoothFlow to the pellets
- Optionally raise the Feeding Zone temperature by 5–10°C
See Extruder motor skipping for full diagnosis.
Best practices
Section titled “Best practices”- Monitor extrusion behavior during the first layers and adjust gradually
- Keep a log per material/batch: temperatures, MVS, additive %, supplier — repeatability matters
- Use SmoothFlow proactively when working with PETG, rPLA, or reinforced grades
- Don’t expect two grades of the same polymer to behave identically
Related notes
Section titled “Related notes”- Temperature sensor NTC 100k
- Heater band
- SmoothFlow
- Liquid Masterbatch
- Rotation Volume calibration
- Max Volumetric Speed
- Extruder motor skipping
- Temperature sensor disconnected