
Dryer
A pellet dryer removes moisture from hygroscopic pellets before printing. It is a separate unit from the printer and is critical for materials like PETG and recycled PLA.
Which materials need drying
Section titled “Which materials need drying”The Ginger Additive D1 dryer is intended for PLA and PETG, including recycled grades with or without natural fibres.
How it works
Section titled “How it works”- The dryer sends hot air into the reservoir / hopper to drive off moisture. It does not blow hot air through a moving pellet bed.
- There is no gravity feed into the printer. Pellets reach the printer the normal way: the G1 feeding vacuum draws them through the white corrugated tube from the dryer’s outlet (the red pellet gate) whenever the printer’s level sensor triggers a feed cycle.
- In other words, the dryer simply replaces the loose pellet bucket as the source the G1’s white tube draws from — see Vacuum pump and Corrugated tube.
Recommended dryers
Section titled “Recommended dryers”For performance / production, use an industrial hopper dryer with an active drying system (molecular sieve or rotating drum) — passive warm-air boxes are not enough for demanding grades:
- Moretto mini dryers
- New Omap (https://newomap.com/) — e.g. the WD.E 15÷30 series
A capacity of around 20 kg is more than sufficient, because the G1 prints at most ~2 kg/h — even a long job will not outpace a 20 kg dryer.
For an entry-level dryer for PETG and PLA, the Ginger Additive D1 is the native option: https://www.gingeradditive.com/products/ginger-dryer
Drying procedure and temperatures
Section titled “Drying procedure and temperatures”The temperatures, times, the cycle itself and what to do when pellets pack together are all on one page, so they cannot drift apart: Starting the dryer.
The two rules that belong here because they are about the machine, not the cycle: keep the gate closed while drying and open it to feed, and leave the dryer on while the printer runs — see the working sequence below.
Connection to the G1 feeding
Section titled “Connection to the G1 feeding”The pellet gate is the red part under the dryer tank. It is where dried pellets leave the dryer and where the G1’s white corrugated tube clamps on. When the feeding vacuum is triggered, it draws pellets from here up to the hopper.
- Ensure all tube connections are sealed — any air gap reduces suction efficiency
- Place the dryer behind the printer, and route the line so it always rises — see Corrugated tube
Pellet gate and guillotine
Section titled “Pellet gate and guillotine”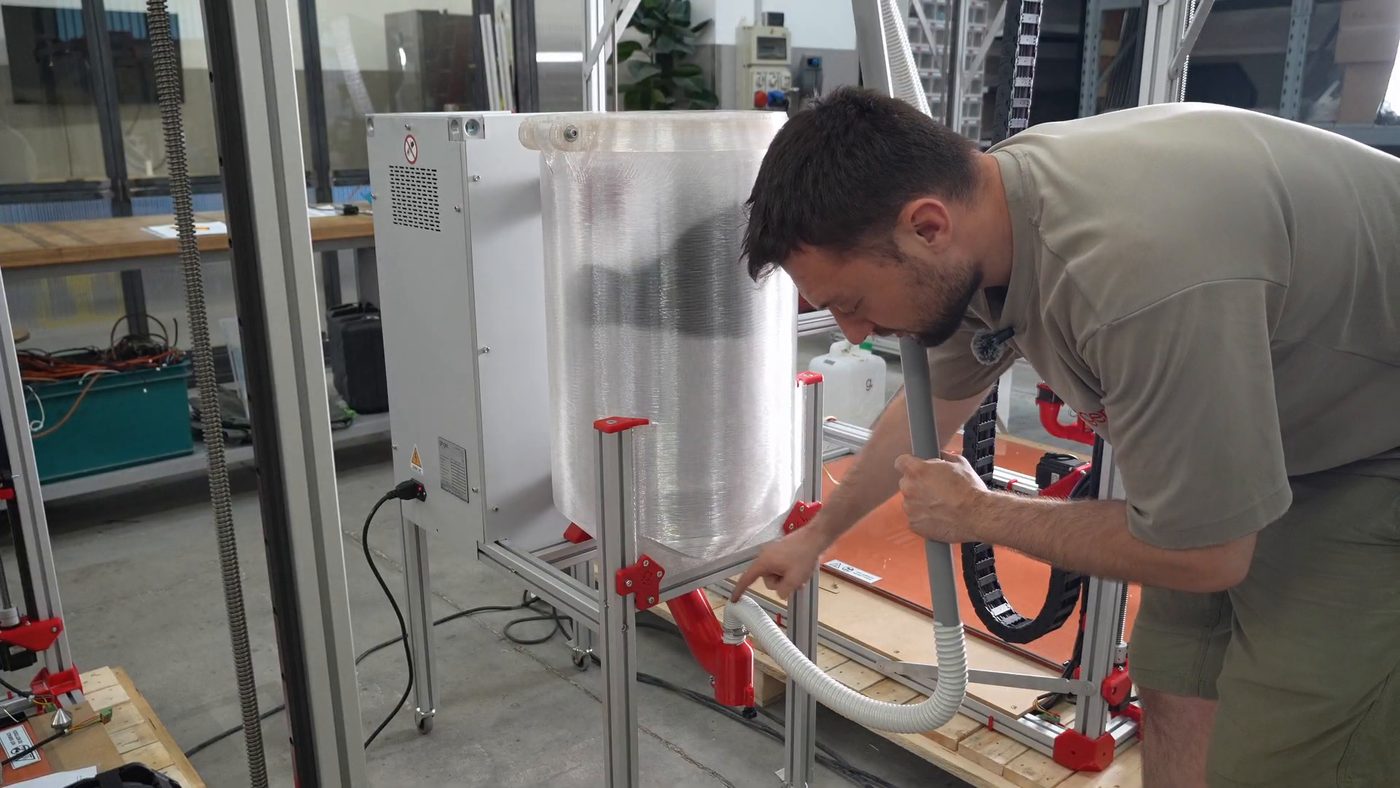
From How the G1 Automatic Feeding System works — 2:03
Two separate things sit between the tank and the feed line, and they do different jobs.
The pellet gate is the pickup itself — the red part the tube clamps onto. It is a pickup filter, and it has two functions:
- It stops pellets falling into the tube under their own weight
- It lets air in, and that air is what carries the pellets up the line
The second one is the point people miss. Pneumatic conveying moves material with airflow, not with suction alone — the pellet gate is what admits the air that does the carrying. See Corrugated tube.
The guillotine is a manual slide between the tank and the pellet gate. It is there to shut the tank off when the printer is not running.
Working sequence
Section titled “Working sequence”- Guillotine closed
- Dry the material for as many hours as the polymer needs
- Open the guillotine when you start printing
Keeping it closed while drying keeps the material in the tank, where it is being dried, instead of letting it sit in the feed line picking moisture back up.
Maintenance
Section titled “Maintenance”- Vacuum filter: clean the feeding vacuum’s filter
- Hopper filter: clean the small filter in the hopper fitting at the extruder — it sits between E04 and E17, where the black gasket is (see Hopper)
- Air gaps: make sure there are no gaps anywhere in the feeding path
- Tubes: check the corrugated tubes are not punctured
- Dryer: check the dryer’s own filters and that there are no blocks of compacted material inside
Storing dried pellets
Section titled “Storing dried pellets”Do not add loose desiccant to the pellets: if air is getting in, the better fix is to seal the path, not to risk contaminating the material.
D1 Dryer — Ginger Additive native model
Section titled “D1 Dryer — Ginger Additive native model”The D1 is Ginger Additive’s own pellet dryer, purpose-built for the G1 workflow. It holds about 25 kg and connects to the feeding line directly through its pellet gate. It has its own section: D1 Dryer — setup, first assembly, maintenance.
Related notes
Section titled “Related notes”- Starting the dryer — temperatures, times, the cycle
- D1 Dryer
- Hopper
- Vacuum pump
- Corrugated tube
- PETG foaming and moisture
- Loading pellets