
Nozzle set
The G1 uses interchangeable nozzles that determine the line width (extrusion width) and therefore the speed and detail of prints. The nozzle screws onto the bottom of the barrel.
Available sizes
Section titled “Available sizes”The full nozzle set sold for the G1 is 1 mm, 1.8 mm, 3 mm, 5 mm, and 8 mm (see the Ginger shop).
| Nozzle | Line width | Best for |
|---|---|---|
| 1 mm | Fine detail, slow prints | Small objects, high detail, delicate structures |
| 1.8 mm | Fine-medium | PETG and rPLA with small nozzle (lower Feeding Zone temp needed) |
| 3 mm | General purpose | Most design objects, standard production |
| 5 mm | Medium-large | Larger parts where 8 mm is too coarse |
| 8 mm | Large, fast prints | Furniture, large structural parts, fast prototyping |
Nozzle material
Section titled “Nozzle material”The G1 nozzle is made from hardened stainless steel, designed for:
- Glass fiber (GF) reinforced materials
- Carbon fiber (CF) filled materials
- Recycled pellets with abrasive fines
No special nozzle upgrade is needed for abrasive materials — the standard nozzle handles them.
Layer height rule
Section titled “Layer height rule”The shipped process profiles settle this — layer height sits at roughly half the nozzle diameter, with line width a little above it:
| Nozzle | Layer height | Line width |
|---|---|---|
| 1.0 mm | 0.6 mm | 1.2 mm |
| 1.8 mm | 0.9 mm | 1.9 mm |
| 3.0 mm | 1.3 mm | 3.2 mm |
| 5.0 mm | 2.5 mm | 5.5 mm |
| 8.0 mm | 4.0 mm | 9.5 mm |
Pick the process profile that matches your nozzle and both follow automatically.
Exceeding this ratio causes the nozzle to drag on the previous layer, leading to apparent “layer shift” or surface defects.
When to replace the nozzle
Section titled “When to replace the nozzle”There is no interval. A nozzle is not replaced after so many kilograms or so many hours — it is replaced when it stops doing its job. Signs of a worn nozzle:
- Inconsistent line width even after Rotation Volume calibration
- Visible scoring or denting at the nozzle tip (from collision with the print or bed)
- Extrusion becomes irregular without any change in material or settings
A nozzle can also be damaged by:
- Crashing into the bed during homing (if Z offset is incorrect)
- Printing at excessive speed above Max Volumetric Speed
- Physical impact
Installation requirement: PTFE tape
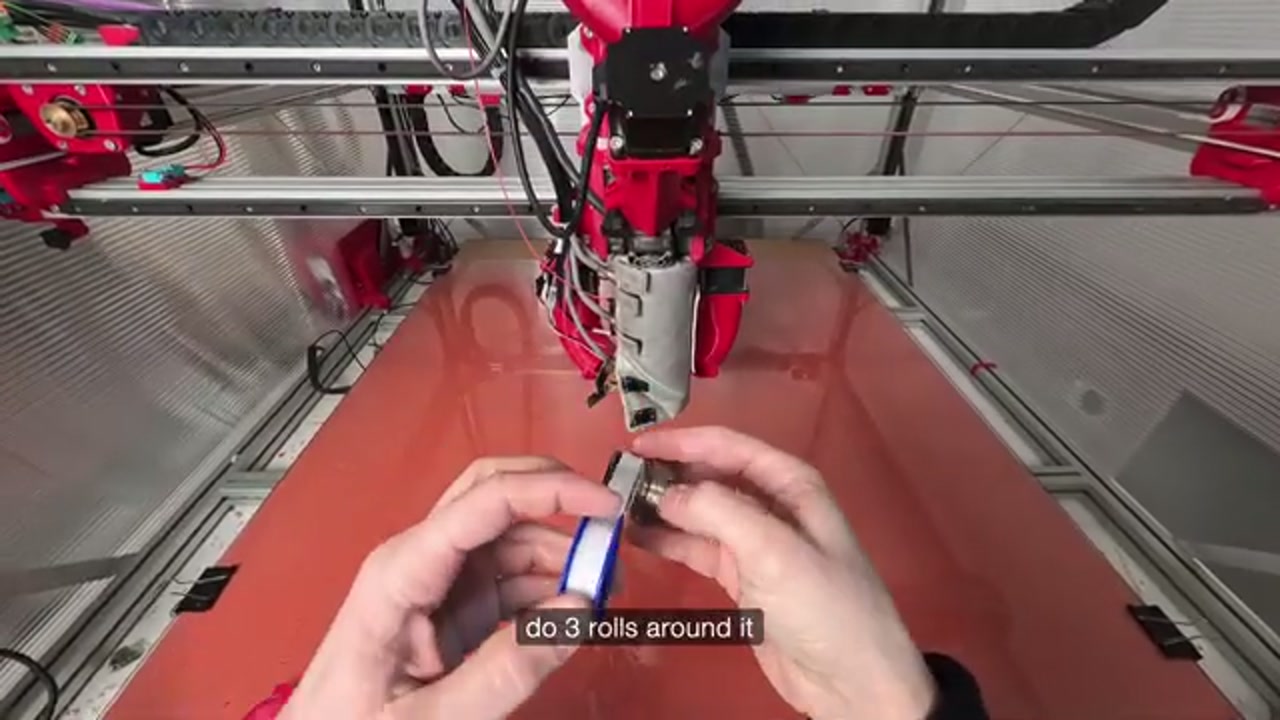
Section titled “Installation requirement: PTFE tape”Every new nozzle must have PTFE tape (teflon tape) wrapped for 3 turns around the thread before installation. This seals the thread against the barrel and prevents molten plastic from leaking along the thread during printing.
Replacement procedure
Section titled “Replacement procedure”The easiest way to replace the nozzle is to use the built-in CHANGE_NOZZLE macro from the printer display:
- From the KlipperScreen display, open Macros and run
CHANGE_NOZZLE - The guided procedure walks through 5 steps — it positions the printhead automatically and manages temperatures
- See the full step-by-step guide: Nozzle replacement
The machine has a guided procedure for this — the CHANGE_NOZZLE macro, walked
through step by step with photographs in
Nozzle replacement. Use it. The outline
below is what that procedure does, not a substitute for it.
- Heat all zones to the printing temperature for the material in the barrel — the figures are in Material profiles
- Hold the barrel with a wrench — never apply torque to the barrel body itself
- Unscrew the old nozzle counterclockwise
- Wrap the new nozzle’s thread with PTFE tape, 3 turns. Without it, molten plastic leaks along the thread
- Thread it on finger-tight, using a cloth or gloves
- Tighten gently with a wrench — do not overtighten
- After cooling and reheating, re-check tightness
- Recalibrate Z offset and first layer — a new nozzle changes the Z reference
Ordering
Section titled “Ordering”Spare nozzles are available from Ginger Additive — current sizes and prices are on the shop.
- Other sizes: check the Ginger shop
Related notes
Section titled “Related notes”- Layer shift — layer height vs nozzle size ratio
- Nozzle and barrel clog — cleaning a clogged nozzle
- Barrel clog purging procedure — full purge when nozzle is severely blocked
- Z offset and first layer — recalibrate after nozzle change
- Max Volumetric Speed — maximum flow rate per nozzle size