
Display screen
The G1 has a touchscreen display on the front-left panel running KlipperScreen — a graphical interface for the most common printer controls without needing a browser or computer.
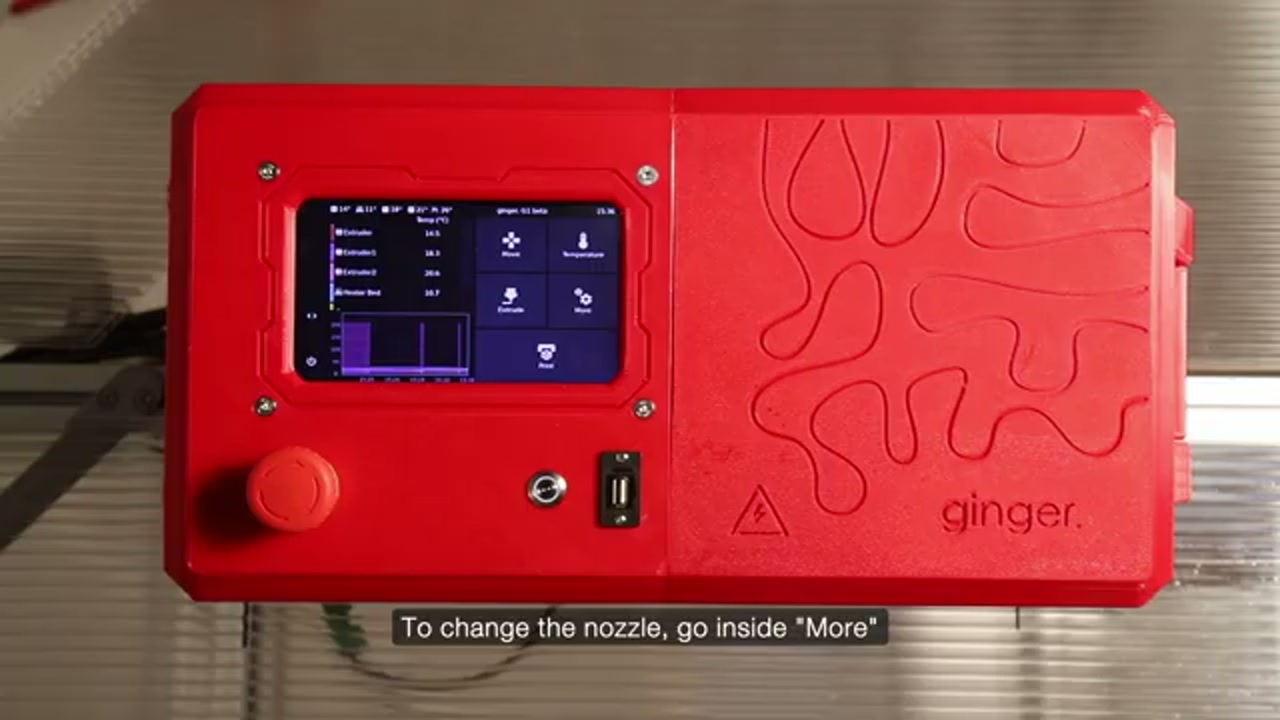
What you can do from the display
Section titled “What you can do from the display”- Start, pause, cancel a print
- Monitor temperatures for all heating zones and the bed in real time (a deeply negative reading, around -90 °C and often flickering, means that sensor circuit is open — not that anything is cold)
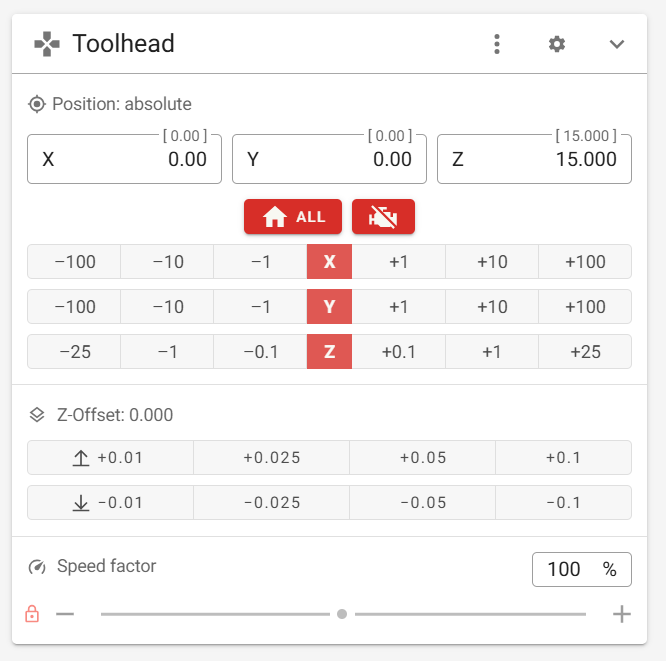
- Z offset adjustment — live during a first layer or with the printer idle, in 0.1 mm steps from Fine Tuning. This is the nozzle-to-probe distance and is not the same as screw adjustment (gantry tramming) — see Z offset below
- Bed leveling — run
BED_LEVELfrom the Macros list - Emergency stop — immediate full shutdown (same as the physical red button)
- Extrude — manual extrusion control (avoid Retract in normal use — see note below)
- Fan speed — manual override during a print
- Macro buttons — custom macros configured in Klipper
Key behaviors to know
Section titled “Key behaviors to know”Print will not start (blocked by temperature)
Section titled “Print will not start (blocked by temperature)”The print now only refuses to start if the extruder is more than 5°C below the target temperature set in the G-code (it waits until the material is hot enough). Fix: let the extruder reach within 5°C of the slicer target before printing begins.
No material extruded right at the start? This is usually not a fault. When you print straight from cold, the plastic at the very tip of the nozzle can still be solid even though the extruder reads close to target: the nozzle tip sits ~3 cm below the heater, outside the extruder’s insulation cushion, so it lags behind. For example with PLA at 180°C, the extruder may reach 175°C and start while the tip is still cold. Give the nozzle a short dwell at temperature (or run a purge) before judging extrusion.
A reading goes deeply negative
Section titled “A reading goes deeply negative”The reading is not arriving. An open circuit puts it at the bottom of the sensor’s curve — around -90 °C, and usually flickering rather than sitting still. Take the number as indicative: what identifies the fault is that the reading is negative and nowhere near physical, not that it matches a figure.
In practice the break is a JST connection, not a failed sensor. The exact
depth varies with the sensor: the bed runs an EPCOS 100K B57560G104F while the
three barrel zones run per-zone curves (NTC100K3950.up, .mid, .down), so
you may see -99 in one place and -90 in another. Same fault either way.
Where to look: Temperature sensor disconnected for a zone, Bed heater for the bed.
Minimum temperature error → print cancelled
Section titled “Minimum temperature error → print cancelled”Klipper will not extrude below 160°C (min_extrude_temp). If a zone falls under it mid-print the extrude move is refused and the print fails there — the guard exists so the screw never turns against unmelted material. If this happens unexpectedly: check temperature stability on the graph in G1OS dashboard — may be a sensor connector issue.
Z offset
Section titled “Z offset”The Z offset is the distance between the nozzle tip and the probe tip. The G1 probe is a switch lowered by a small servo motor; when lowered it acts as both endstop and probe. With the probe down, the nozzle-to-probe distance is roughly 10 mm, but it must be calibrated for the specific nozzle fitted and typically varies by a few tenths of a millimeter from printer to printer.
How to set it:
- From the display, use Fine Tuning and adjust the Z offset in 0.1 mm steps. You can do this live during a print or with the printer idle — bring the nozzle to Z0 and check it just meets the bed.
- You can also adjust it from the Mainsail web dashboard under Toolhead → Z-Offset.
- After adjusting, Save Config (
SAVE_CONFIG) — the printer reboots to apply it.
More menu
Section titled “More menu”The More button on the KlipperScreen home screen opens a secondary menu that contains the most important calibration and advanced controls.
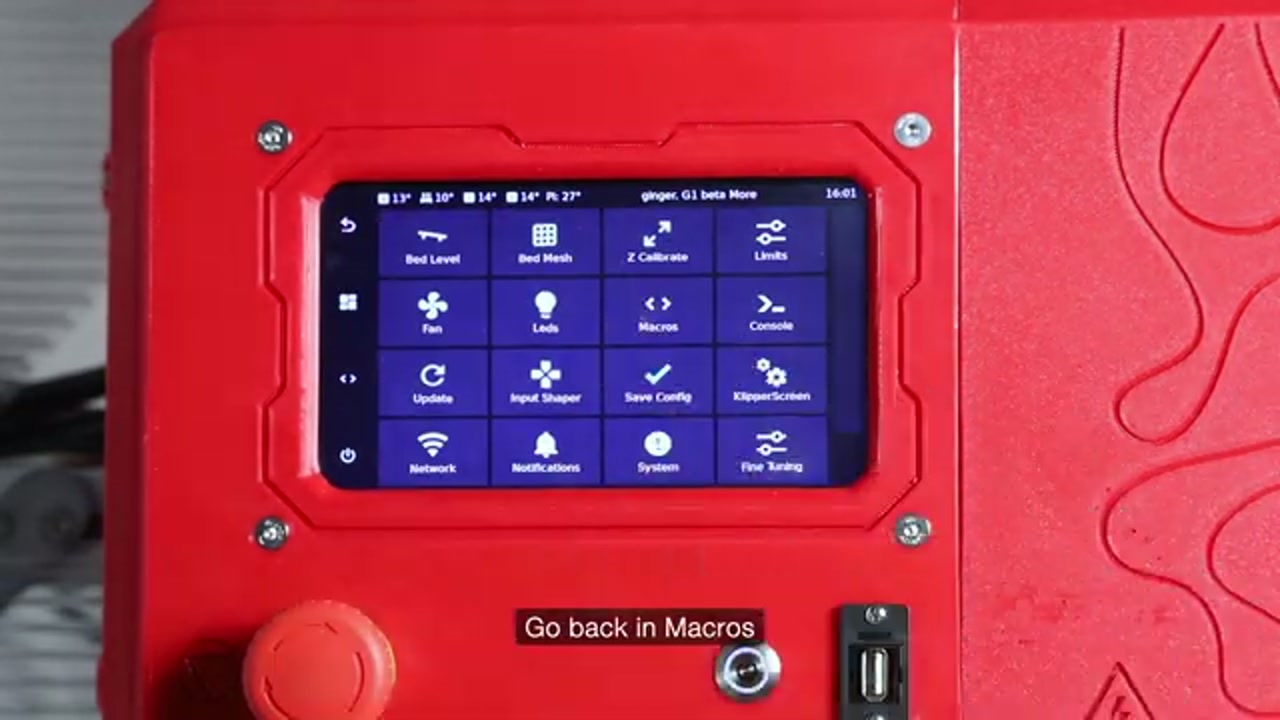
Items visible in the More menu:
| Menu item | Function |
|---|---|
| Bed Level | Runs the full automatic bed mesh leveling (probes all grid points) |
| Bed Mesh | View and manage saved bed mesh profiles |
| Z Calibrate | Runs Z screw adjustment to tram the four corners |
| Limits | Configure velocity and acceleration limits |
| Fan | Manual fan speed control |
| Leds | LED lighting control |
| Macros | Access all configured Klipper macros |
| Console | Klipper command terminal on the display |
| Update | KlipperScreen and firmware update manager |
| Input Shaper | Resonance compensation calibration |
| Save Config | Saves the current configuration to printer.cfg — use after leveling |
| KlipperScreen | KlipperScreen app settings |
| Network | Wi-Fi and network settings |
| Notifications | Notification settings |
| System | System information and power controls |
| Fine Tuning | Live adjustment of speed, flow, and Z offset during a print |
Console access
Section titled “Console access”For commands not accessible from the display:
- Connect a keyboard to the Raspberry Pi USB port, or
- Use the Console in the G1OS web interface (
http://g1os.local) — full Klipper terminal
Troubleshooting the display
Section titled “Troubleshooting the display”| Problem | Likely cause | Fix |
|---|---|---|
| Display blank / off | Power issue or KlipperScreen crashed | Check display cable; restart KlipperScreen from G1OS Machine section |
| Display shows “Connecting…” | Klipper not running | Do a Firmware Restart from G1OS |
| Touchscreen unresponsive | Software hang | Reboot the Raspberry Pi from G1OS power menu |
| KlipperScreen update available | Normal | Update via G1OS Update Manager |